Sunday, June 1, 2014

Project 2 - Emotive Walk Cycle

For the second part of project 2, i have decided to do on Question 2,  which shows the character's personality/attitude while walking. I have chosen to animate the character with an "act-cool" and arrogant personality. The animations are shown as below.


Front angle


Left angle


Right angle


For this animation, I made use of the first part of project 2 (the standard walk cycle). I edited the animation from there. I started off by editing my character's pelvis/hips values. At frames 6 and 24, i brought the value of translate Y down so that when my character walks forward, his hips/pelvis area will move downwards, allowing him to give off a very upbeat and hyper character. After that, i adjusted my character's arms. I focused more on the shoulder area. I rotated the arms accordingly (towards his chest) so that whenever the character swings his arm forward, that particular arm would move backwards, making my character look like it is walking with a lot of pride. I also rotated the characters arms away from his chest when he swings them away from him. This is to depict an arrogant personality and to give off an "act-cool" vibe. Next, i straightened and aligned the character's elbows whenever he swings his arms forward. I then adjusted the values for his fingers. I slightly opened the character's fist whenever he swings his arms out. In order to show that my character is arrogant, i emphasized the personality by adjusting the angles of his head as he walks. I rotated my character's head slightly higher than normal, and made him look left, and right, and then to the left. I have also rotated his chest to the left (when he brings his right feet forward) and to the right (when he brings his left feet forward). While doing this project, I have learnt to be extra careful with the positions of the setting of keyframes. I equalized the value on the timeline so that my character does not jerk at any part and does not display any awkward movements. This will make my animation look smoother when i allow the animation to playback.

This project has taught me a lot of things. One of the most important things it has taught me is how important it is to make animations look real and act realistically as possible. I have also come to realize that we MUST animate every part of the character's body if we would like to animation to look as real as possible as well as to give off the emotion it wants to present.

Different types of emotive cycles will require different steps to be taken. Things to be taken into consideration would be the character's body positions, the way the arms swing, the length of duration and the positions of keyframes of when you would like a limb to step forward, whether or not the whole feet should touch the ground it should tiptoe, or how much angle you would need to tilt the character's head to to show a certain type of emotion etc.

I am satisfied with the what i have created and i believe i still do have rooms for improvement, i am proud that my hard work has been paid off. This part of project 2 is relatively tedious for me because there were no guides or lecture slides provided and I had to source for my own references, which i did (I used YouTube videos and online tutorials as a guide to help me come out with my final animation). After having completed this project, I am more confident in animating 3D characters now and with hard work and patience, no matter how difficult it is to animate a certain character and make its movements and actions as real as possible, it is always possible.

Project 2 - Standard Walk Cycle

Front angle


Left angle


Right angle


In this assignment, i have created this man walking forward. I followed the slides provided by Mr Douglas closely and used the powerpoint slides as a guide to create this animation. I must say that the slides were very useful and of good help.


This was provided in one of the slides given. I made use of this to adjust the character's pelvis/hip movement as the character moves (Translate Y). This was a very useful guide for me when i was trying to coordinate the leg movements with the key frames.


This was provided in one of the slides given too. I find that this was extremely helpful when it comes to animating the whole 36 frames where i had to coordinate both legs and hands movements. 


I made use of the guide above (also provided in powerpoint slides by Mr Douglas) to set the hands and legs positions at the respective number of frames. This has helped me save up on time while creating the animation. 


I feel that this walk cycle was relatively tedious to do. I spent a lot of time making my character walk smoothly. I started off by making my character take a step forward. I did so by making my character's left leg move forward first. After which, i made the character's left leg move forward. While doing so, I have learnt that it is highly important to divide the keyframes equally (i have used 36 frames per cycle in this walk cycle). We also have to animate the character to make it walk/move smoothly by making sure that at frames 0, 18 and 36, the legs, heels, hands and hip positions are set to the same units so that my character looks like it is walking smoothly (at frame 18, i had to set the respective units at frame 0 to my character's opposite legs and hands. However, at frame 0 and 36, my character's legs and hands will have the same input units because these are the frames where my character starts and stops respectively. This is an advantage for me because at the end of doing this animation, i looped the video.). For the character's arms to move smoothly as well as to show that the character is walking at ease, i made sure that when the left leg is taking a step forward, the character's right arm will swing forward. When the character's right leg is taking a step forward, his left arm will swing forward. This simply allows the character to look naturally while talking a walk. In, i have adjusted the character's fingers as well. As we all can see, my character will slightly open and close his hands as he walks. This was done so by selecting the respective fingers and adjusting the various units to help make my character look natural. At this stage of completion, I still felt that my character was a little stiff. I then added on a head movement where my character's head slightly bobs up and down as he walks to show that he is comfortable walking and that he is not having a neck-ache. I have also shifted this check forwards a little as he walks to show that his body is being brought forward as he is walking. Also, I have looped my animation and repeated the frames to the 180th frame to ensure that my video lasts for 5 seconds. This was a very interesting project to work on, and i definitely enjoyed the whole process because I have learnt to create a walk cycle without much help from my peers and lecturer, and this has certainly given me a sense of achievement. Although i have spent a lot of time with this part of project 2, I am very pleased and satisfied with my animation and i am even more motivated to move on to the second part of project 2. :)

Monday, May 19, 2014

BigDog Animation

(1) If engineered or programmed badly, BigDog would fall over. Watch the full video again, and describe how BigDog’s legs move while walking– what is the sequence of leg movements for one complete step? Use the terms BL, BR, FL, and FR for the back-left, back-right, front-left and front-right legs.

Answer:  
The sequence of BigDog's leg movements for one complete step is 
FL and BR  FR and BL → FL and BR  FR and BL → BigDog's legs movement stabilizes

(2) Explain how this sequence of movements manages to balance BigDog’s body weight.

Answer: 
Since BigDog has been kicked towards its right, its body weight will naturally fall towards the direction of force to balance itself. With that said, after BigDog has been kicked, his FL legs moves towards the direction of force (together with its BR leg). After which, BigDog balances its bodyweight by bringing its FR and BL legs followed by its FL and BR legs over towards the right. This is where its FL and BR legs has just crossed its FR and BL lehs and at this point of time, BigDog's FL and FR legs are spread very wide apart to prevent itself from falling down. Lastly, BigDog brings its FR and BL legs towards the right and this is where BigDog's body's position is stable enough to allow its 4 limbs to stand and balance itself stably. This shows that BigDog moves its legs alternately to keep itself stable and that BigDog has its center of gravity of keep itself balanced.


(3) Look at BigDog_kick_slow_motion.mov. Draw a storyboard of BigDog stabilising itself after being kicked. You should draw the key poses. You don’t need to draw well – but you must show the leg positions and the body rotations around the X, Y and Z axes for each key pose.


----------------------------------------------------------------------------------------------------------------------------------


Clara's BigDog Animation

I was tasked to animate BigDog's movement on Maya. It is shown as above.

It was a relatively challenging for me to create this animation. The main problem that i faced while animating BigDog was i had a hard time coordinating its body and legs' movements. It took me a couple of tries before i managed to make BigDog move smoothly from its left to right. I rotated the body as it moved from its left, and i ensured that I set a keyframe everytime I move a leg or change any position (I was very careful in this area because i am very careless!). I was also very careful with the amount of space i had allowed between BigDog's FL and FR as well as the length of space between its BR and BL. I ensured that BigDog's FR coordinates with its DL (and vice versa) by selecting both FR and DL and moving them to BigDog's right (because direction of force is towards its right) together. I have also learnt that if the legs are spread out too wide apart, the whole animation would not look realistic at all. 

All in all, I am satisfied with the outcome of my hard work and i had fun creating this BigDog animation. Although there are still quite a bit for me to improve on, I have learnt a lot about leg movements and this will definitely benefit me in my upcoming projects.  


Spiderman Animation


The video above shows the animation of the spiderman shifting weight which i have created from the raw file provided by Mr Douglas.

I personally feel that this was a difficult task to do because i had difficulties trying to move spiderman's hips upwards without making his legs "float" in the air. I managed to move his hips from its left to right and the shifting of his weight can be seen with the movements of his knees. I faced a lot of problems while animating this. I changed spiderman's (facing) direction from left to right by adjusting his shoulders. I rotated them carefully so that his arms will not look dislocated. I also adjusted his hands and fingers, allowing this fist to clench as he turns from left to right. It was easy for me to change the direction that he is facing. I simply rotated his head and followed the spiderman video i had to follow. In this lesson, Mr Douglas taught the whole class how to set key frames and animate the poses. I have also learnt that we can save time setting keyframes by checking the "auto-keyframe" button. I have come to a conclusion that animating can be simple and less time-consuming if you were to switch on the auto-keyframe option. when you are careful with setting your key frames right because if you were to accidentally change the position of any part of the spiderman at a random keyframe, that key frame will be automatically set (without you knowing) and this may lead to having an undesired pose when the animation is bring played. After having completing this exercise, i have learnt a lot about shift weight animation but there are still rooms for improvement for the animation that i have done.

Monday, May 5, 2014

Project 1 - Spiderman Poses

Pose 1
The image above shows the spiderman pose I was tasked to follow. The screenshots below show the results of this pose that I have created using Maya.


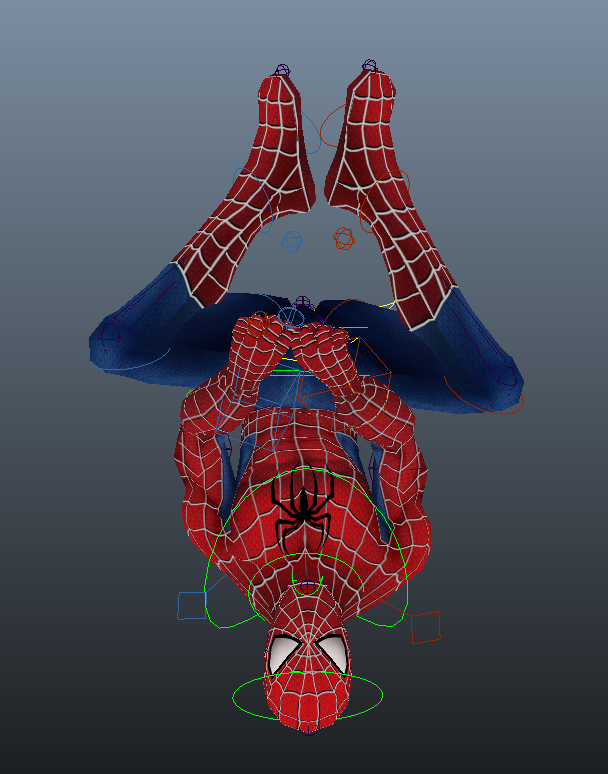
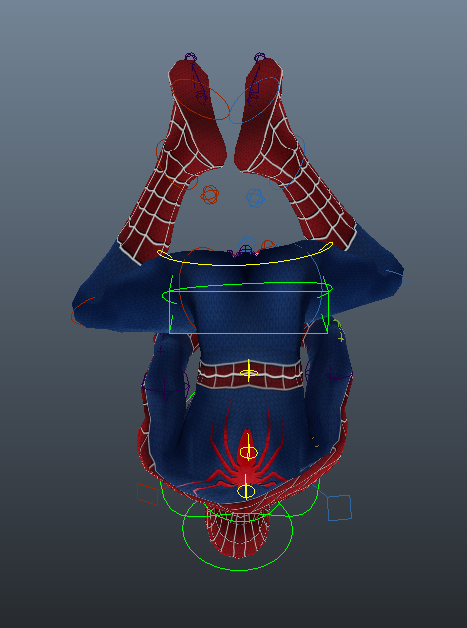
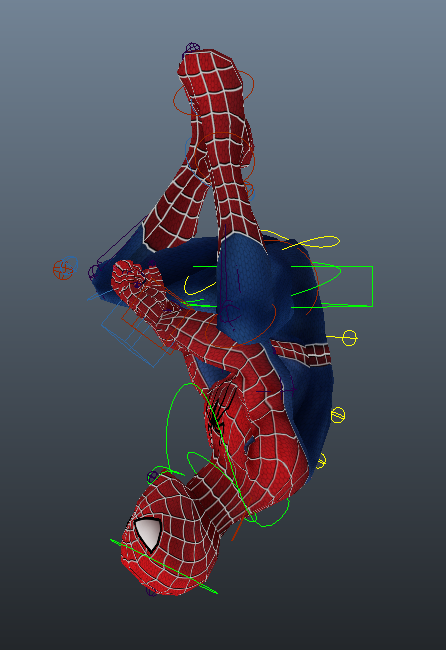
The screenshot above shows my spiderman hanging upside down. His hands are actually grabbing an imaginary rope from above, allowing him to hang himself upside down steadily.

From the original spiderman position, i started out by rotating spiderman upside down.

For spiderman's posture, to make him look balanced, i had to ensure that his back is slightly bent. To be able to do this, i made use of all three spine controls and rotated them accordingly to make his body curve proportionately. Next, I adjusted spiderman's thighs, legs and feet using forward kinematics. It was slightly tricky for me in this area as I was very confused with which joint i had to rotate in order to achieve a certain angle. I played around and managed to get the best result as shown above by rotating spiderman's hips, thighs and legs using the forward kinematics control. As for this feet, i simply rotated them upwards so that they look pointed. To straighten spiderman's arms and allow it to grab the imaginary rope, just like the original image, was the toughest part for me. I used inverse kinematics and rotated spiderman's arms around. I was restricted to only rotating/moving his wrists, elbows and and upper arm around so i faced quite a bit of difficulty in this area. To be able to grasp the rope, the spiderman's fingers are wrapped around the rope, where his four fingers on both hands are curled inwards in the same directions respectively, and his thumbs over his fingers. I simply adjusted the finger's positions by selecting and changing their values.


Pose 2
This pose above was found on http://marvel-movies.wikia.com/wiki/File:Spiderman_leap-up.png. Spiderman looks like he just jumped off an edge and is "flying" forwards for something.


For this pose, the legs were similar to that of pose 1's leg position. Similarly, I made use of forward kinematics and rotated the thighs, legs and feet. I found out that to make spiderman look more like he is about to jump onto something/someone is to adjust his posture and make his upper back bend forward more. To achieve that, i rotated the back spine controls. The trick is also to rotate his shoulders and bring them backwards while his elbows are lifted about just as high as his shoulders. I had a hard time bringing spiderman's elbows up to the height of his shoulders because I was quite lost and i did not know which part of the arm to handle in order to bring his whole arm up. After approximately 20-30 minutes of trying and getting odd looking arms, i managed to get my final results by rotating spiderman's shoulders and elbows backwards and doing so carefully step by step. To make it more realistic, i rotated his wrists as well. In this pose, spiderman's fingers remain clenched and i did not face any problem with that.


Pose 3
The image above was found on http://3.bp.blogspot.com/-tvmPtJBXCIc/TrTd2lfbGaI/AAAAAAAAAJA/mFU9VXZLag0
/s320/spiderman.jpg.

As we all can see, spiderman is bent forward on both limbs, with an arm swung backwards with his fingers spread out evenly, indicating that he is ready to pounce on something/someone.

I rotated spiderman's left shoulder and his upper arm, followed by his wrist to make spiderman's left arm swing backwards. It was rather tricky because i had to rotated slowly and carefully because if i were to rotate to the back a little too much, his left arm would look unusual and dislocated and that is not what i want. For his fingers, i adjusted every single finger and gave them a wider spread and bent every finger to make them look more curved. For the legs, i rotated spiderman's hips and adjusted them slightly higher and made his back bend more. This will allow his shoulders to come forwards and downwards, enabling this right hands to easily touch the ground. As for his foot, his left ankle was rotated downwards to make it look like it is flat on the ground. As for his right foot, i made his toes point towards the ground, making him look like he is balancing himself with his left feet. 


Pose 4
I came up with a fourth pose because I played around with pose 3 after achieving my result. I thought spiderman look really cool posing like this thus i couldn't not resist posting this pose up :) 
As you can see from the screenshot above, i had curled his fingers and made them look like spiderman is ready to shoot his web but he is just chilling and waiting for his prey to appear in sight. 


After having completed project 1, i have learnt how i can make use of inverse kinematics and forward kinematics to create 3 dimensional character poses. I have tried my best to model all the poses as shown above. Overall, i had fun with these spiderman poses and i felt it got smoother and i got the hang of it as i played around with the rotations and adjustments. I have had an enjoyable time modeling these poses and i certainly hope to be able to learn more and create even more complex poses.